


Remodeling a bathroom in San Francisco is exciting, and it is also a high-stakes project. The anxiety is justified: DBI plan review can take weeks, opening a wall in a Victorian or Edwardian home can reveal galvanized plumbing or knob-and-tube wiring, and Bay Area labor costs are not comparable to national averages. This bathroom remodeling guide is written for San Mateo and Bay Area homeowners who want straight answers, local numbers, and a plan that accounts for the realities of compact footprints, condo and HOA rules, Title 24 and CALGreen requirements, and the premium cost of local trades.
Step 1: Planning Your Bathroom Remodel and Layout
Before you fall in love with a tile or a tub, get clear on what you are actually building. Planning is where the money is either saved or quietly lost, and it is the single biggest predictor of whether your project stays on budget.
Defining Your Project Scope
Not all bathrooms ask for the same investment, and matching your scope to the room’s purpose keeps spending sensible.
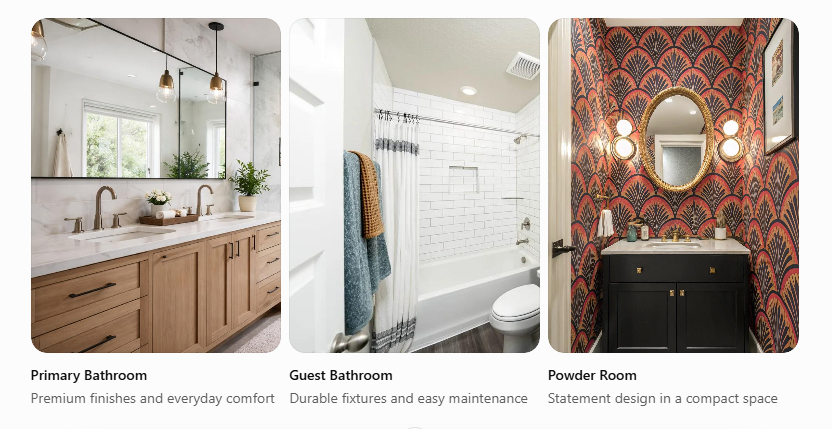
A master bathroom (or primary bath) is where it makes sense to invest most heavily, starting around $30,000 to $65,000 (luxury can cost more higher). This is your daily retreat, and buyers scrutinize it at resale. Dual vanities, a separate shower and soaking tub, quality finishes, and generous storage all belong here.
A guest or full hall bath should be comfortable and durable but rarely needs luxury-tier everything. Prioritize easy-clean surfaces, solid fixtures, and a layout that works for family and visitors alike.
A powder room (half bath) has no shower or tub, so your budget stretches furthest here. With only a sink and toilet, a powder room is the one place where a bold wallpaper, a statement vanity, or a dramatic light fixture delivers high impact for relatively little money.
H3: Assess Bathroom Space, Layout, and Traffic Flow
The most important early decision is whether to keep your existing layout or move plumbing. Keeping toilet, sink, and shower drains in their current positions is the surest way to control cost. Relocating plumbing lines is one of the biggest budget drivers in any remodel, often adding anywhere from $1,500 to $10,000 once you factor in rerouting supply lines, drains, and venting, plus patching floors and walls.
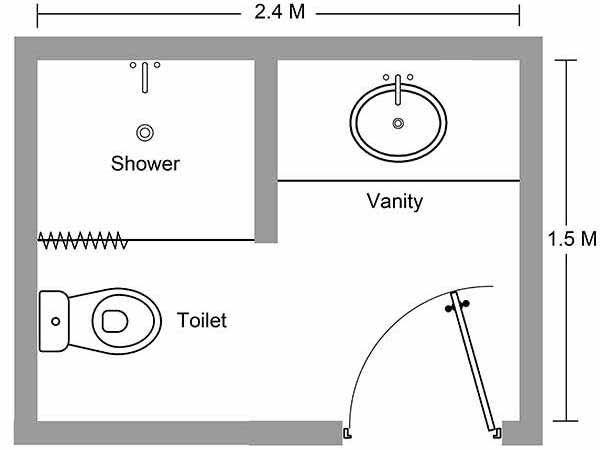
If your current footprint feels tight, work smarter before you work bigger. Floating (wall-mounted) vanities free up visual floor space and make small rooms feel larger. Built-in niches and recessed shelving add storage without stealing square footage. A well-zoned layout, with the wet zone separated from the vanity and toilet, simply feels calmer and functions better, no demolition required. Reserve the expensive move of pushing out walls for when the existing space genuinely cannot serve your needs.
Step 2: Define Your Research and Inspiration Scope
With your scope and rough layout in mind, start collecting references so your vision becomes specific enough to price and build.
Treat inspiration as research, not daydreaming. Build a dedicated board on Pinterest, save posts on Instagram, and browse platforms like Houzz where you can filter real projects by style, size, and budget. The goal is to move from a vague feeling, such as wanting the room to feel relaxing, to concrete, buildable choices.
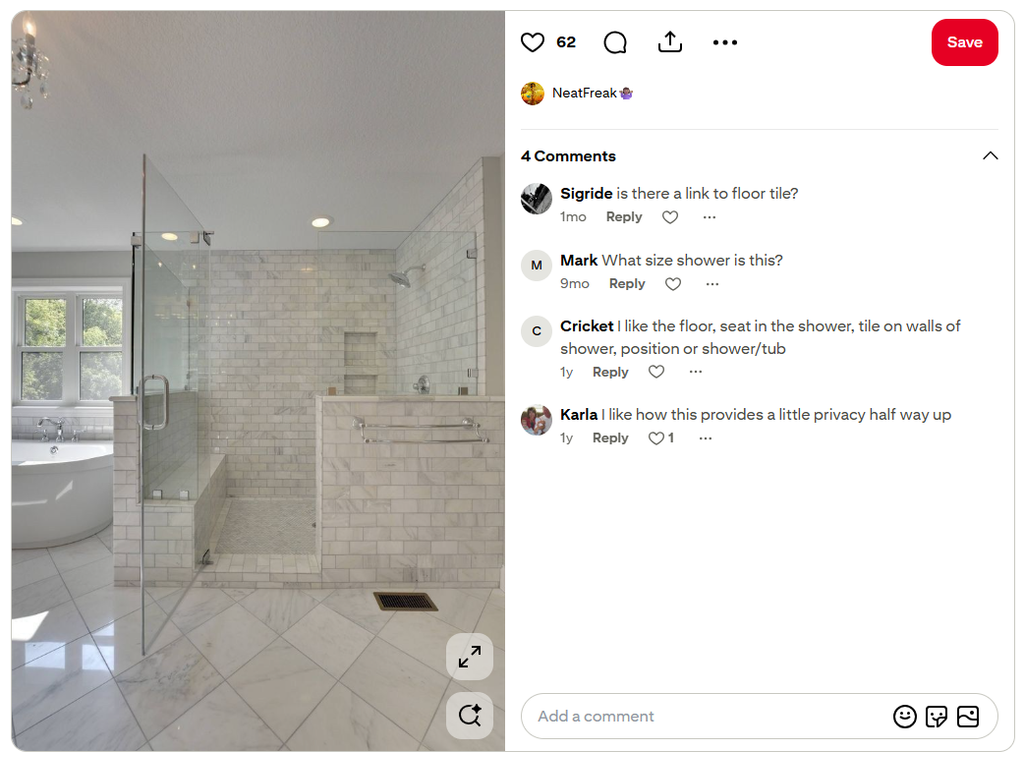
As you save images, look past the mood and note the details that actually drive decisions and cost: tile format and finish, vanity style, faucet and hardware color, shower glass type, and lighting placement. Pull together a focused set of ten to fifteen images that genuinely share a language rather than fifty that pull in every direction. Watch for current design directions, too. Homeowners are moving away from the all-white, cool-gray look toward warm, personal, wellness-focused spaces with natural materials and intentional finishes.
This curated reference set becomes your communication tool. Hand it to a designer or contractor, and you will get far more accurate quotes, because they can see exactly what you mean instead of guessing.
Step 3: Budget, How Much Does a Bathroom Remodel Cost?
Bathrooms are deceptively expensive to renovate, because so much cost hides in plumbing, waterproofing, and labor rather than the finishes you can see. Nationally, a typical bathroom remodel runs roughly $10,000 to $30,000, with averages often cited around $14,000 to $16,500. A cosmetic refresh may land between $3,000 and $10,000, while upscale and luxury remodels can exceed $50,000 to $100,000.
Split your budget roughly across major categories. Labor and materials together take about 80 percent, with the vanity and the shower or tub alone accounting for 40 to 50 percent of material costs. Paint, hardware, lighting, and accessories make up the smaller remainder.
The line item most people forget is a contingency fund. Set aside an extra 10 to 20 percent for hidden issues like mold, rot, water damage, or corroded pipes that surface once walls open. It is the difference between a minor delay and a stalled project.
One more reality: licensed plumbers charge roughly $85 to $175 per hour in 2026, which is why the layout decisions in Step 1 matter so much to your bottom line.
Step 4: DIY vs. Hiring Bathroom Remodeling Contractors
Knowing what to tackle yourself and what to hand off protects both your wallet and your home.
Bathroom Tasks You Can Safely DIY
The DIY boundary is shaped by permit triggers and trade licensing, not just skill. In San Mateo, work that keeps existing plumbing and wiring in place generally does not require a Development Services (building) permit. Tasks that usually stay permit-free include:
- Painting and patching plaster walls.
- Swapping a faucet, showerhead, toilet seat, or towel bars.
- Replacing a toilet in the exact same location with a CALGreen-compliant fixture.
- Cosmetic vanity replacement where the plumbing rough-in is unchanged.
- Minor tiling where waterproofing is not replaced.
These are low-risk because the work is cosmetic and reversible, and it does not touch the systems that inspections exist to protect. The moment you move a drain, add a circuit, or open up waterproofing, you have crossed out of DIY territory and into permitted, licensed work.
When to Hire Specialized Professionals
Once a task crosses a permit trigger, it belongs with a licensed pro. In California, these trades need the right CSLB license, so verify licensing and insurance first. Match the pro to the work:
- Licensed plumber: moving drains or supply lines and plumbing rough-in.
- Licensed electrician: new circuits, GFCI, heated floors, and fan wiring.
- General contractor: walls, multiple trades, and inspections.
- Design-build firm: larger remodels under one roof.
- Waterproofing or tile specialist: shower pans, membranes, and wet-area tile.
Using licensed pros also keeps your permit record clean for resale.
Step 5: Selecting Durable Materials and Core Fixtures
In a wet, humid, heavily used room, durability is not a luxury. It is the whole point. Choose materials that look good on day one and still perform in year ten.
Flooring and Wall Finishes
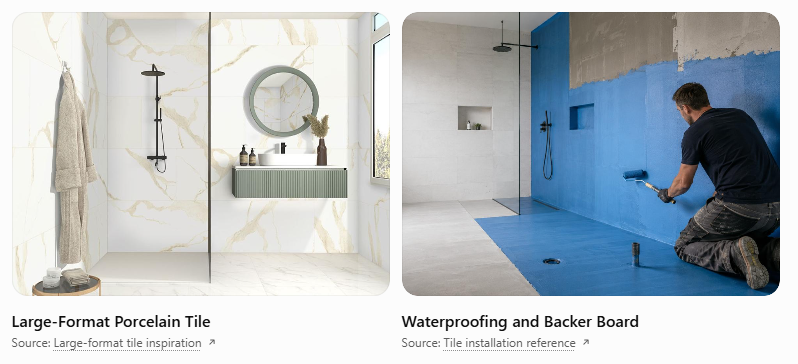
Large-format porcelain tile is a top choice for both floors and walls because it resists moisture, wears exceptionally well, and uses fewer grout lines, which means less maintenance and a cleaner look. Luxury vinyl plank (LVP) is a popular budget-friendly, water-resistant alternative that is warmer underfoot and easier to install. Behind the tile, specify moisture-resistant drywall, plus cement backer board or a waterproof membrane in wet zones, rather than standard drywall, which fails when exposed to persistent humidity.
Choosing the Right Bathtub, Shower, and Vanity
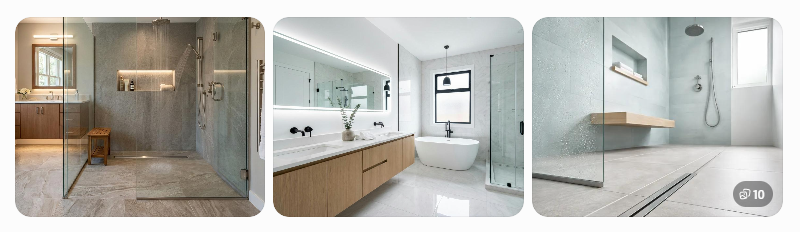
These are your anchor fixtures and your biggest material spend. Curbless (zero-threshold) showers are increasingly sought after for their clean, open look and easy access. Freestanding soaking tubs create a spa-like focal point in larger bathrooms. For the vanity, quartz countertops are a favorite for their durability, nonporous surface, and low maintenance compared with natural stone. Remember that the vanity and the shower or tub together often represent 40 to 50 percent of your material budget, so this is where to allocate carefully.
Lighting and Ventilation Essentials
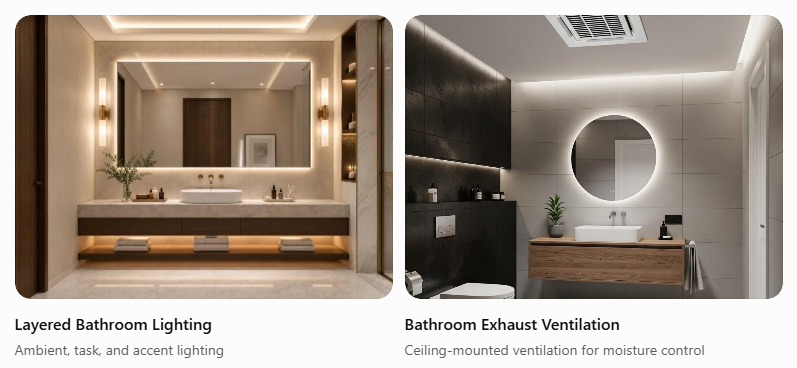
Great bathroom lighting is layered. Combine ambient lighting for overall illumination, task lighting at the vanity and mirror (ideally on both sides of the face to eliminate shadows), and optional accent lighting for atmosphere. Just as important, and far less glamorous, is ventilation. A properly sized exhaust fan vented to the outside is non-negotiable. Without it, trapped moisture breeds mold, lifts paint, and destroys finishes. Good ventilation quietly protects every other dollar you spend in the room.
Step 6: The Construction and Renovation Phase
This is when the plan becomes real. Knowing the sequence helps you anticipate each stage and spot problems early.
Demolition and Foundation Prep
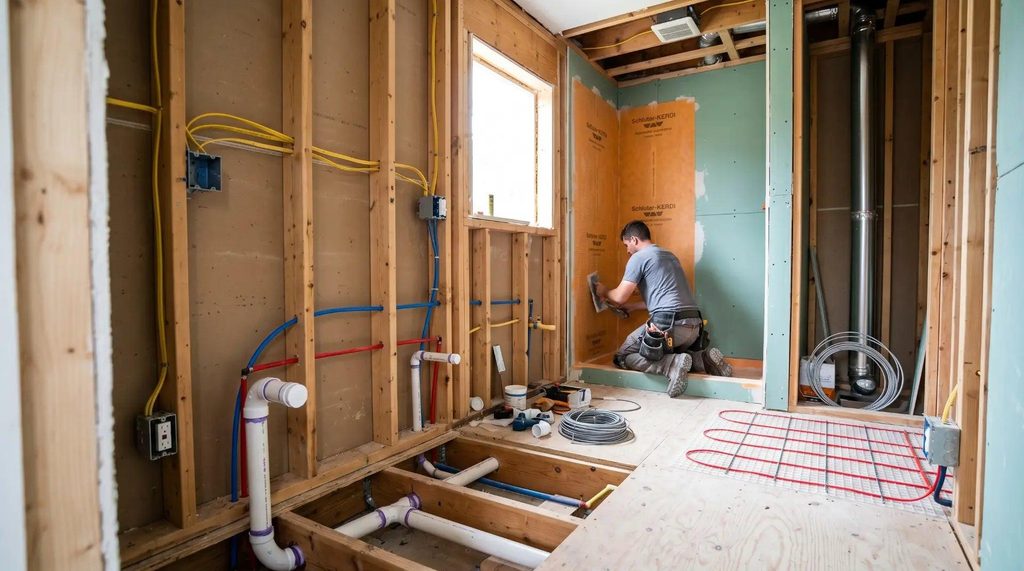
Demolition is fast, loud, and messy. Old fixtures, tile, and often drywall come out down to the studs and subfloor. This is the moment hidden conditions reveal themselves, such as water damage, mold, rot, or surprise wiring, which is exactly why your contingency fund exists.
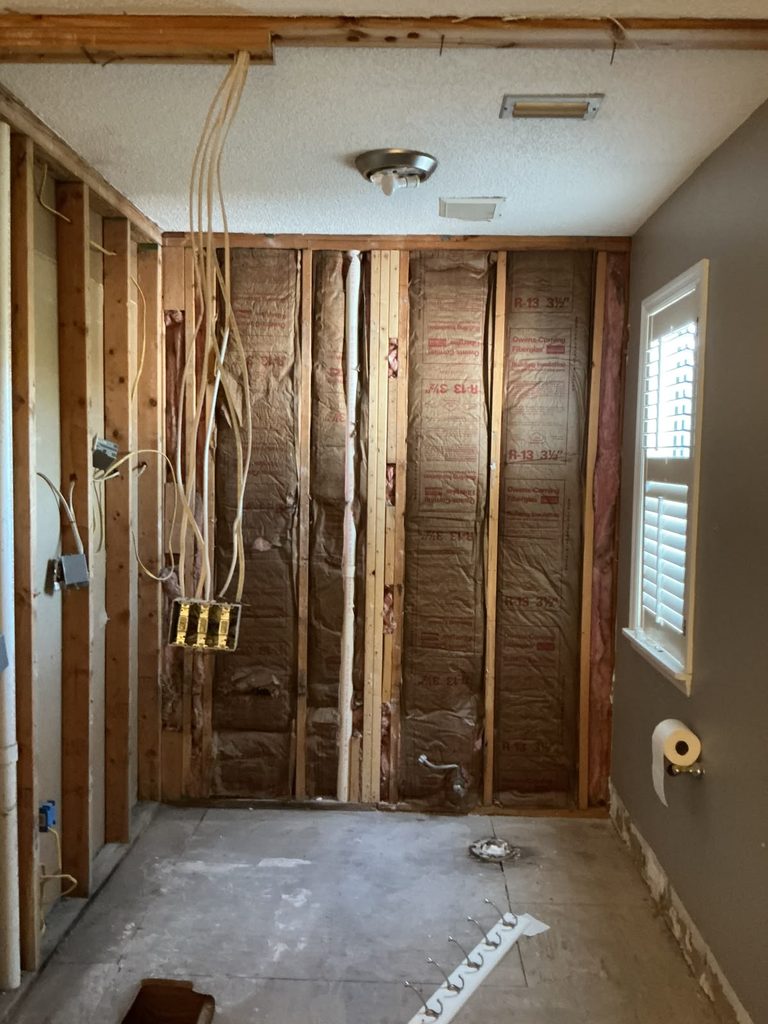
Expect the space to look worse before it looks better, and budget a day or two for proper cleanup and protection of the rest of your home.
Behind the Walls: Rough-In Plumbing and Electrical
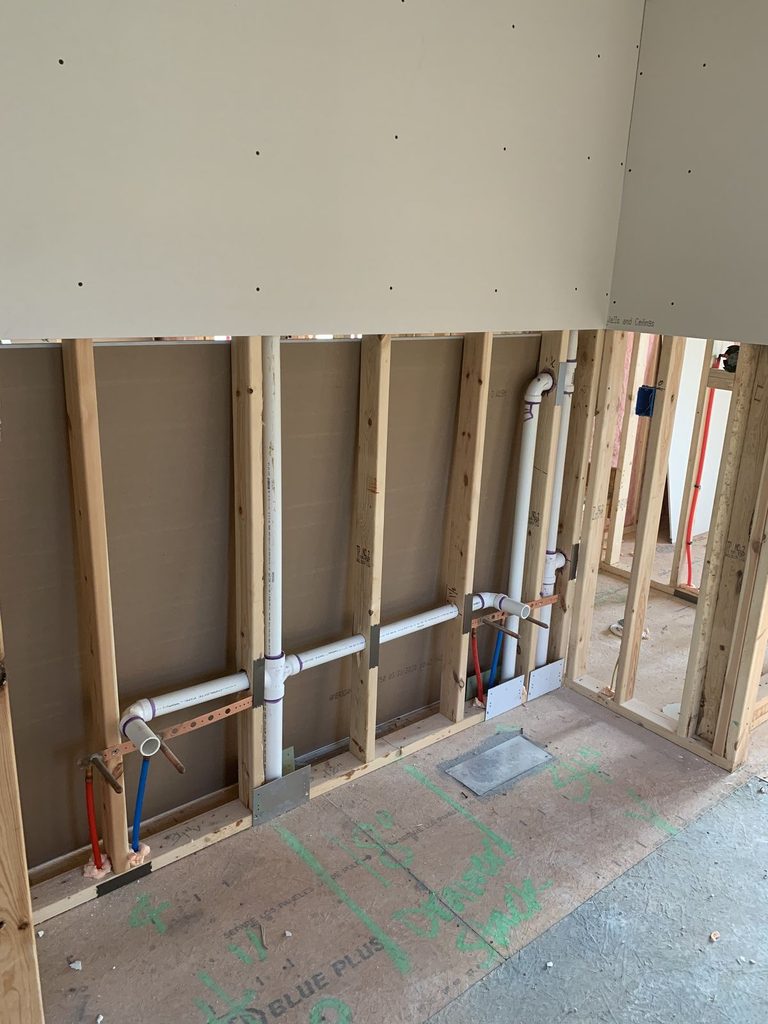
With everything open, the trades do their critical work. This is the time to upgrade undersized drain lines, inspect the health of existing pipes and replace anything corroded, and confirm your electrical panel can support modern features like heated floors, a smart toilet, or additional lighting circuits. Rough-in work is invisible once walls close up, so it must be inspected and done right the first time. Cutting corners here is what causes the leaks and failures that force a second remodel.
Waterproofing and Moisture Control
Before any tile goes up, wet areas get waterproofed. Proper waterproofing membranes behind and beneath the shower, combined with mold-resistant grout and quality sealant, are what keep water where it belongs.
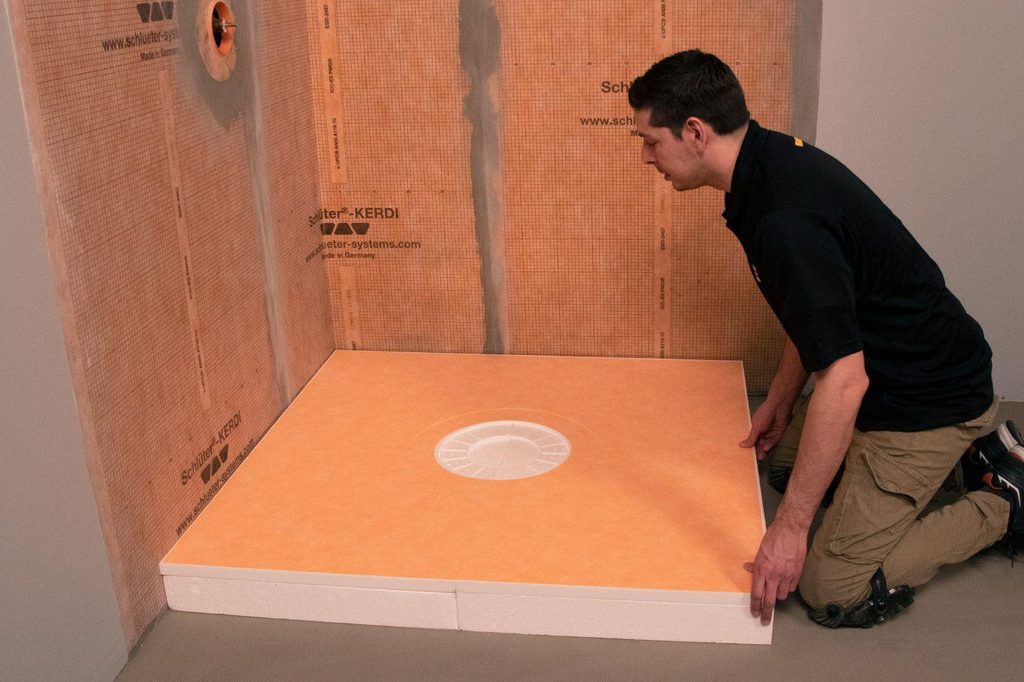
This layer is the unsung hero of a long-lasting bathroom. It is inexpensive relative to the total project yet prevents the single most destructive and costly failure a bathroom can suffer.
Step 7: Modern Bathroom Design Trends and Upgrades
Once the essentials are handled, thoughtful upgrades turn a functional bathroom into a standout one.
Smart Home Bathroom Technology
Technology has moved firmly into the bathroom. Heated flooring adds everyday comfort and a strong wow factor, smart toilets offer bidet functions and auto features, touchless faucets improve hygiene and reduce mess, and anti-fog mirrors with Bluetooth and integrated lighting blend utility with luxury.
Aging-in-Place and ADA Accessibility
Designing for the long term is smart planning, not just compliance. Grab bars (or blocking in the walls so they can be added later), wider doorways, comfort-height toilets, and curbless, roll-in shower designs make a bathroom safe and usable across every stage of life, and they broaden your home’s appeal at resale.
Eco-Friendly and Sustainable Design
Sustainability saves money while it saves resources. Low-flow toilets, faucets, and showerheads cut water use substantially with no real loss of performance, and reclaimed or recycled materials add character and reduce environmental impact. LED lighting and efficient ventilation round out a greener, lower-cost-to-run bathroom.
Creating a Spa-Like Retreat
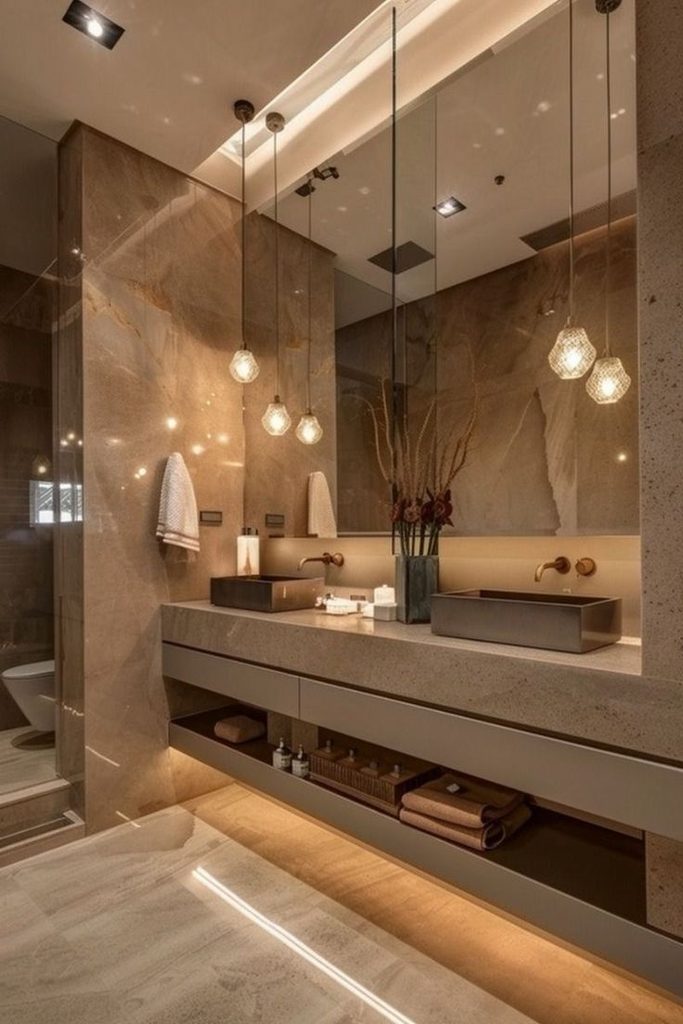
The leading design direction is the bathroom as a personal wellness retreat. Natural stone, warm wood tones, soothing and earthy color palettes, soft layered lighting, and a freestanding soaking tub as the centerpiece all work together to transform a utilitarian room into a place you actually want to linger.
Frequently Asked Questions About Bathroom Remodeling
How long does a standard bathroom remodel take?
A typical full bathroom remodel takes about five to eight weeks from demolition to completion, though timelines vary with scope and permitting. A cosmetic refresh may wrap in one to two weeks, while a full gut remodel, a layout change, or custom materials on backorder can push the project longer. Factor in permit review time on top of construction.
In what order should you remodel a bathroom?
The reliable sequence is: plan and design, gather inspiration and finalize selections, set the budget, secure permits, demolish, rough-in the plumbing and electrical, waterproof, install flooring and wall tile, set the vanity, tub, shower, and toilet, then finish with lighting, paint, hardware, and a final inspection. Working top-down and inside-out, meaning structure before surfaces and rough-in before finishes, prevents expensive rework.
Do you need a permit to remodel a bathroom?
Usually yes, for anything beyond cosmetic changes. Moving plumbing, altering walls, and changing electrical all typically require permits, and larger projects often need separate building, plumbing, electrical, and mechanical permits. Pure cosmetic updates like painting or a like-for-like fixture swap generally do not. Permit approval times vary by jurisdiction, often around two weeks for straightforward bathroom work, so build that into your schedule. Your contractor should handle the application and inspections.
Conclusion and Next Steps
A successful bathroom remodel is won long before the first tile is set. Meticulous planning, an honest budget with a real contingency fund, the right team for each job, and durable materials installed in the correct sequence are what separate a smooth, lasting renovation from a stressful, costly one. Get those fundamentals right and the finished space will reward you every single day, while returning strong value if you ever sell.
Ready to take the next step? Download our free bathroom remodeling checklist to keep your project organized from demolition to final walkthrough, reach out to a licensed local contractor for a personalized quote, or subscribe for more practical home improvement guides delivered straight to your inbox.